Showing posts with label sewing for myself. Show all posts

Monday, April 22, 2013

yes you can! Sew Knits with Confidence! aka Nancy Zieman's new book/blog tour + giveaway

 *****GIVEAWAY CLOSED - WINNER HAS BEEN NOTIFIED*****

Wow! Was that the longest title for a blog post ever?! Well, now you know what we're talking about today!

I was so happy to be asked to participate in the blog tour for Nancy Zieman's new book, Sew Knit With Confidence + her 4 new knit patterns.  She sent me a copy of her book and each of the four patterns to review and choose one of the garments to make.  She also sent me a book and pattern set to give away (see end of post)!

Untitled


I'm not going to lie.  I was reeeeeally nervous about making something out of knit.  I have a serger which is great for sewing knits, but I mostly use it for finishing of the seams on nice non-stretchy cotton.

After reading through the book and all of her great tips in there I decided I could try it, and if it didn't work out then, oh well, at least I gave it a go. I decided to make the 6 panel skirt from the Monterey Collection. It ended up being super fast!  The actual sewing time was easily less than an hour.

Looking back on the whole project I think the two hardest things were unrelated to the pattern!
1. It is really hard to find nice knits in good colors at local fabric shops.  I need help sourcing good knits!
2. The knit I chose - while pretty (milk chocolate brown with gold flecks on it) and drapey - it was VERY hard to lay flat on the floor to cut out my pieces!!

After a call for help on Instagram I tried taping it to the floor to get it flat and keep it in place while I pinned.

I ended up using my fun new tool - the tracing wheel and chalk paper - to just trace the size I wanted onto the fabric.  I made a size medium skirt with a s XS length as I am not super tall and wanted it to hit just past the knee.

Plus I had plans to try out a rolled hem since the knit was pretty thin, I wasn't sure a traditional hem would turn out so well.  And I wanted to learn how to do a rolled hem!


The skirt panels went together very easily! I was pleased with the cut of the pieces that give the skirt a nice flare and flounce just above the knee.


I then decided to try out the hem after being encouraged by several friends at the retreat I went to last weekend.  I got out my manual, got a bagel for some sustenance, and opened up the machine and started changing the settings.
And what do you know!!!??  It was so easy.  All I had to do was follow 3 simple instructions! I really should read the manual more often.

As a side note: I did use a serger for this skirt - but the pattern has excellent instructions for using a regular machine too.  So a serger is NOT necessary for sewing knits.

I love the way it turned out on the skirt!

Untitled

The last step in the pattern was to put in the elastic in a way I had never tried.  You sew the elastic to the wrong side, stretching as you go.  Then you fold it over and anchor in the seams so it doesn't fold back up!  I tried to take a photo here.
I love the nice clean look of the waistband with this method.

Untitled


The bottom line is, I learned so many things from this one simple pattern! I was just thinking today how the title really is appropriate, I do have more confidence sewing knits.  And not just knits, but with the new techniques I learned for using my serger! Win-win! Plus I have an easy comfy new skirt to wear.

Untitled

Pardon the selfie on my phone!  I didn't have a chance to get some better photos taken.  But this gives you a good idea.  The fit is perfect and the knit is so comfortable.  I see myself making more of these in the near future!!

Check out the rest of the posts in the tour with many more chances to win!
April 16, 2013 Nancy Zieman the Blog
April 17, 2013 Gertie’s New Blog for Better Sewing
April 18, 2013 Totally Stitchin 
April 19, 2013 Sew Beautiful Magazine 
April 20, 2013 Marie Madeline Studio 
April 21, 2013 Stitchin Jenny’s
April 22, 2013 Amy Lou Who Sews 
April 23, 2013 Sew News
April 24, 2013 Designs in Machine Embroidery  
April 25, 2013 Riley Blake Designs 
April 26, 2013 The Sewing Loft Blog 
April 27, 2013 Nancy Zieman the Blog 

Now it's your turn to win, just leave me a comment and tell me what the scariest sewing project is that you've ever tackled.  I will choose a winner of a Sew Knits With Confidence Book and Knit Pattern Set! I'll announce winners at the end of the week! 

Don't forget - if you are a no-reply blogger leave your email in the comments.  Or just go click on the little button over there on the side and remedy the problem! :)


Wednesday, February 20, 2013

WIP Wednesday: more scrappy tripping along

I've been feeling the itch to get caught up here on the ole blog and couldn't decide where to start as I have many completed projects and my forever sewing room cleanup/organization project. So I think I'll continue to tell you about my most current WIP.

I knew I didn't have enough of my fat quarter bundle to pull off the whole quilt but at the same time wasn't sure about how much I actually needed.  I was worried about cutting too much of any given fabric or what colors I needed to supplement.  What I needed to do was get the blocks finished that I was working on and just see where I stood.

So I let my strip sets sit around for a while until the other night when I sat down with a Downton Abbey rerun (I have A LOT to say about that show!!) and sewed up the rest of the blocks I had prepped.  Here's an idea of what it will look like.  I'm really loving it!

It's a start! I swear I thought I had more blocks finished! #scrappytripalong
I have 13 blocks finished and am planning on 30 total. I'm not as far along as I'd hoped but I have some new fabrics to add in and I think it's going to turn out really cute.

I plan on backing it with the blue chevron and binding with the red dots! 

This is one quilt that I'm hoping to finish for myself in record time.  I started it in January and hope to have it all done in the next month or so.  

I'm also mulling over an Amy Butler Weekender bag.  I got the pattern for Christmas and am currently debating fabric choices: buy something new? or use up my stash?  Tough decision.

Thursday, January 24, 2013

scrappy trip around the world

I drank the kool aid folks.  There was this amazing surge of awesomeness happening on Instagram a couple of weeks ago.  Lots of little scrappy blocks turning into beautiful quilt tops in what seemed like seconds!

It is basically a trip around the world quilt made with 2.5" squares!  It's strip pieced with a twist to make it so easy!! Go see the tutorial at Quiltville, I'm not going to explain it all again, but I'll show you some pictures of what I've been up to!  You can also see many more by searching #scrappytripalong on Instagram or Twitter.

Remember when the lovely Fat Quarter Shop asked me to curate a fat quarter bundle for them?  I decided this bundle would be the perfect start for this quilt.  Although, to make a large lap quilt it's not quite enough fabric!  So I went to my LQS and picked up some red Riley Blake mini chevrons and dots!
I needed to keep all of these strips organized since I was not doing a true scrappy look. So I pulled out my clothes drying rack and hung them all right there next to my sewing machine! Perfect!
 
I chain pieced strips together in sets of two and then again into sets of four.  And they went together really quickly!
After sewing these sets into tubes (the tutorial explains this and it make more sense once you see it) I cut them across the seams into strips of little blocks! yippee!
Once you get the strips organized and sewn back together you get something like this:

And I have all of these small 2.5" strips left over that I am going to be able to use for a baby quilt.  I'm excited about that too.  I just love these fabrics so much.  And the colors!! They make me happy.
This may be the Chinese year of the rat snake - but for me? It's the year of the quilt. I've got plans to finish up some UFOs!!

Friday, June 01, 2012

sew & tell v3.33 - a little bit of tweaking

I'm in love with skirts in the summer. I love wearing them like shorts with t-shirts (that may or may not match) and flip flops. I blogged about this skirt pattern last year and have been converting friends to it as well A friend came over this last week to sew and I helped her make this beauty!


My friend just finished this amazing skirt! I don't think there's a fabric in that LOVE line that doesn't look good as a skirt.

I've been stewing over some Joel Dewberry fabric since I bought it last fall. I bought it initially thinking I would make a skirt. Then I thought maybe it would make a cool tunic. Then it didn't get made for the fall. I pulled it out the other day and after a few consults with some friends I went back to the initial plan! The other problem is that the print is so big and lovely that I didn't want to cut it up into two tiers.

I tweaked that original pattern into a simple dropped waist skirt and I love it!!
a new skirt for me!
Now I am going to make like 18,000 more.

I'm planning a {not a} tutorial on this skirt soon!

What did you do this week? Can't wait to see!
Linky Rules.  Please follow along for a fun party!
1. Please write the post for sew & tell - or add a blurb mentioning sew & tell to a post written since the last sew & tell.  If you are linking to a post with your own tutorial, please make sure it was a finish from this week and that the completed project is shown first.
2. One linky per person. (please put multiple projects in one post.)
3. Link to your specific post.  (See here for permalink instructions - or email me.)
4. Link back here with a link or a button (HTML on my sidebar).
5. Be sure to visit and leave comments on other's posts!

Please put your (blog)name instead of your project name, it helps us get to know each other better!

Friday, July 22, 2011

vacation all i ever wanted...

I just got back from a trip to see my mom who happens to live in Utah fabric shop mecca.  I took a bunch of projects with me, but didn't get as many finished as I'd hoped.  I was too busy hanging out with family, friends and sewing bloggers in real life!  It was so fun!  But I'm afraid 2 weeks wasn't quite long enough.

I have over 500 pictures to go through, so I'll leave you with a few snapshots of some of the things we did.

lemon cake
It was my mom's birthday while we were there. So I made a little cake. Lemon cake mix, lemon curd filling (recipe here) and cream cheese frosting. And yes, that is basil on the top - just for decoration. The cake was a hit! The boys (and there were a lot of them) ended up cleaning up the leftover lemon curd out of the bowl with their spoons.

another top!

I finished another one of these tops. This time I made it a bit longer, and I like the length better. I also used bias tape to finish the neckline like it says too. Once again I used elastic thread to finish off the sleeves. I also learned that I like my serger (a White) better than my mom's Hobby Lock. It's probably because I know my machine better.

working on the pieced back of my ginger blossom quilt

I finally got the back of this quilt figured out. I was hoping to quilt it on my aunt's longarm while I was there but I didn't get it put together. Luckily I have an awesome mom who said she would do it for me! THANKS MOM!!

adult skirt turned sundress

My sister-in-law made this cute dress out of a size 14 thrifted skirt. She just took chunks out of the sides and then sewed some pleats in the top and added the straps. Genius!

that's for real.  Utah sunsets are pretty awesome.

I tried to spend as many nights as I could watching the sunsets from the back deck. Seriously gorgeous.

There are some other fun things I was able to do, people I met and fabric I bought. I'll share more soon!

Friday, July 01, 2011

sew & tell - july 2011

Happy July!  I know it's a long weekend for those celebrating Independance Day!

I've been on a sewing binge lately and realized that if I'm sewing a lot, I'm not blogging very much.  And if I'm blogging a lot, I'm not sewing very much.  This is a tricky balance since I try to blog about what I sew... so I'll spread out some of the projects I've been working on and just share a few of my favorites today.

I blogged about this skirt I made a few weeks ago.  I AM in LOVE and would wear it every day if I could get away with it.  So the next best thing?  Make more!  Here's the finished product of skirt #2.
new skirt #2
And I have another one cut out ready to sew!

And seriously, these skirts are so contagious! SO contagious in fact that the lovely Jessica, from diaper clutch and super sweet homecoming/reunion photo fame begged me to help her make some.  Okay, maybe she didn't beg, more like I insisted she could do it and she did!

I've said this before, one thing I love about sewing with other people is that I learn about fabric choices.  Everyone's vision is different and Jessica picked out some fabric that I never would have thought to use. AND WOW. I LOVE the final result.

We went to our LQS and she picked out some adorable pieces.  One Amy Butler (did you think she would be able to escape my influence?)

and Wonderland, anyone?
Jessica's awesomeness

I worked with this fabric a couple of years ago and made a bag out of it.  I guess I had it pigeonholed into bag or quilt only fabric.  But I love it in a skirt.  In fact, I think we are going to trade skirts for a week or so.  :)

My mom and I get to spend some time together for the next couple of weeks.  I hope to have some more fun stuff to show you!  It's always fun to sew with her.

What did you finish this month? And of course - if you were able to help someone with a project,  do share!

PLEASE READ THIS POST IF YOU ARE NEW TO LINKING UP!  :)
NEW RULES FOR LINKING UP!  Please read carefully.  The delete monster will be eating non-compliant links.
1. Please write the post for sew & tell - or add a blurb mentioning sew & tell to a post written since the last sew & tell.  If you are linking to a post with your own tutorial, please make sure it was a finish from this week and that the completed project is shown first.
2. One linky per person. (please put multiple projects in one post.)
3. Link to your specific post.  (See here for permalink instructions - or email me.)
4. Link back here with a link or a button.
5. Be sure to visit and leave comments on other's posts!


Thursday, June 23, 2011

a very pink day

Did you know that today is National Pink Day?  Well if you follow pinksuedeshoe, you already know that.  Pink, as I like to call her, loves the aforementioned color.  So much so that each year on her blog she goes ALL out celebrating pink.  She's having a pink giveaway all week and then today will be filled with pink posts and all sorts of good fun.  Not to mention that if you live in Utah you can go The Pinkalicious Party she is throwing where you can partake in pink cupcakes, pink raspberry lemonade, and catch her with her newly dyed pink locks! (or click on that link and you can see a photo)

If you know Pink at all you know that in addition to the color pink she loves to thrift (pyrex and vintage sheets specifically).  Yesterday, I wore my new shirt that I made (in pink!) and went thrifting.  I found some pyrex, although faded, and some vintage sheets!  I couldn't stop thinking that I was having a very Pink day.

Here's a peek at my loot:
thrifting loot
awesome green vase, hand stitched linen napkins, pink (faded) pyrex pie plate, sheets

The aqua sheet is so smooth and soft!  I can't wait to use it on the back of a quilt! And I'm pretty sure they are vintage - look at the labels.
vintage labels on some vintage sheets
I bought this pattern a few weeks back at that big blue box store (don't judge!). I've been looking for a replacement pattern for the Built by Wendy 3835 peasant type top (it's out of print).

And remember you can't judge a pattern by it's cover.  I was looking at the lines and this one looked the most like a shirt I had recently bought at Target.  I wanted to try some elastic thread for the sleeve gathering too.
don't judge a pattern by it's cover
I wasn't sold on the fact that I was going to like this shirt, so I made up a muslin first.  I actually used the muslin from my ball gown skirt and made a mock up and decided it would work.  When I saw this swiss dot at Hancock's (I was shocked!) I knew I had to have it for this shirt.  It's easy and comfy like a t-shirt but looks a lot nicer.
Simplicity G2415
The sleeves called for a casing but  I used elastic thread for the first time to gather the sleeves. I LOVE it!
elastic thread-gathered sleeves
That thread is SO smart!! It knows just the right amount to gather. Amazing.

I know I always like to see the clothing on people when they blog about it.  So here's a shot my 5 year old took (again) this time with my heavy camera.  She did pretty good, but cropped off part of my head,  so I had to fix it a bit. And by a bit, I mean I cut the rest of my head off.  I wasn't wearing any makeup, and who wants to see THAT anyway?
DSC_5995
just a note about that awesome haze in the background - no that's not from some cool lens creating a great effect.  It's actually smoke from a local wildfire.  It smells like a campsite in my house, and not in a good way.
I held up the shirt to a couple of other shirts I like and made this one about the same length. After looking at this picture, I think I might lengthen the next one just a bit more.

I'm going to be honest here, I don't really like how I look in the shirt in the photo - but some random person told me they liked it while I was shopping at Goodwill. (is that a good thing?) It's comfy though and cuter than just another t-shirt.

If you are nervous about sewing clothing this would be a GREAT beginner pattern. I cut out the 3 pieces the other day with the intent to put them aside for later. Then I thought - hey! There's only like 6 seams to sew! So I whipped up the major part of the shirt in about 20 minutes. The neck, sleeves and hem did take a little bit longer.

Hope you have a pinkalicious day! 

Wednesday, June 15, 2011

the summer of no pants - i'm in!

Sara blogged about this summer of no pants thing a few weeks ago.  I already had it in my mind to make some easy breezy comfy skirts for the summer.  But once again, the fear of cutting into my fabric took hold and I couldn't bring myself to do it, worried that I might ruin the fabric and hate the skirt.  But then I finally decided even if the skirt wasn't just right, I loved the fabric enough to compensate.

And now that's it finished and I LOVE it, I wonder what took me so long!!
my new skirt, which I happen to be in love with.
thanks to my 5 yo for taking this picture.  :)

I ended up using this pattern that I bought a few weeks ago. 
some Joann's loot.

It doesn't look like anything exciting from the cover, but I've decided you have to just look at the lines and the construction and imagine it with better fabric.  This is how I address most pattern shopping lately.  In fact, my favorite thing to do is find patterns that are similar to things I already own and then adjust the pattern to match.

So for this skirt, I removed the bottom 2 tiers and adjusted the remaining 3 tiers to be the length I wanted.  My favorite thing? It has elastic in the waist so it's comfy and easy.  I just measured my hips to make sure the first tier was big enough.  I used my serger again to finish off the seams and it looks so great.  I love my serger!!

I've wanted to blog about it for a couple of weeks now. Part of the reason it took me so long is 1) I've been wearing it non-stop B) I had to figure out how to get a decent picture of it and lastly) I have lost my blogging mo-jo a bit.  Hoping to remedy that soon.

I also found this linen blend fabric at Joann's to make another skirt.
future skirt, which I hope I will also be in love with.

I just bought the batiste the other day for a lining. I've been toying with the idea of a different type of skirt, but the more I think about it, I love the drape of the first one so much, I think I'll just go with it!

Friday, May 06, 2011

a trip to the fabric store

Joann's is over an hour from my house.  All this talk about Denyse Schmidt's new line there had me curious.  And I heard they might have some Farmdale . . . But I couldn't justify that long of a drive just to go to Joann's to look.  So I also went to Costco!  Because the nearest one is also over and hour away,  but just down the block from Joann's.

They did have the DS Quilts fabrics.  Well, some of them.  But not the dots which is really what I wanted.  But they did have the Farmdale!
some Joann's loot.

I'll add these 2 yards to the yard I already have.  To have and to hoard until death do us part.

The patterns were cheap and I'm using them as templates so I don't have to reninvent the whole wheel, just part of it.

I want to make a yoked skirt like the ones I've been making for my girls.  And I have a tunic that I want to replicate, and this was the closest thing I've seen.  I'm hoping to be able to change the raglan type sleeve, to a set in one.  We'll see how that goes.... Wish me luck!

Friday, November 19, 2010

sew & tell - the link up + the ball gown

If you haven't seen the post e. from pinksuedeshoe wrote, amylouwho goes to the ball, you HAVE to RIGHT NOW!  It's awesome.  There is a reason I love her.  It's like she was a fly on the wall watching everything! And she made me laugh out loud this morning reading it!

As I'm writing this, I feel compelled to match her hilarity.  There's a lot of pressure following such an awesome post!  I'm sure her illustrations are better too.  I didn't get a picture of me sewing, but I'm pretty sure that was the expression on my face!  Especially after I had taken the hook and eye off 2 times before I got it right.

Her rendition of the story was pretty accurate - calendar and everything.  Although, I must dispel the myth of magic brushes. 

My awesome neighbor and friend Sara worked her magic on my hair.
the back

And I just put makeup ON - that's my secret.  Never wear it,
before


then when you do, everyone will be in such AWE!
super serious face
I'm really pleased with how the ruffle turned out! (love my super serious face?)

So much went into making this dress.  I did a muslin first to try out the addition of the ruffle and check the fit.  Then everyone got sick and I got behind several days, which was why I didn't finish it until yesterday!  I was up until 2 AM the night before working on it too.

USMC 2010 Birthday Ball Gown
I'll spare you all the nitty gritty details, but I learned a ton!
  • I did put in an invisible zipper for the first time without the special foot (because the one I bought doesn't work on my machine).  
  • I also put in a separating zipper for the first time (easier than regular zipper, imo) which took several goose chase runs to find a dress weight 18" separating zipper, only to end up with a 16" one.  Which is why I had to figure out the placement of the hook and eye several times.  
  • The dress was fully lined, though I aborted lining the sleeves because I didn't think it would matter + I just didn't have time.  
  • I figured out that I really enjoy making clothing.  I would like it better without the rush at the end.  I forget how many dresses that I actually made for myself when I was younger.  It's like riding a bike.  I will say, I think it's easier making clothing for others because 1) it's easier to fit patterns to OTHER people and 2) you aren't as critical of other people when it's all said and done.
All in all, I am happy with how it turned out.  There are a few things I would do differently the next time around.  It was tricky working through the pattern because I put sleeves from one view onto the view which was a sleeveless top AND the lining on the faux wrap was trick-EE.  I also ended up not really tacking the lining down, but I think I'm eventually going to replace the zipper, so that's two less things to take out when I do.

Even though he told me not to, I'm posting this picture of him (Shhhh, don't tell!).  I love his new uniform! It's an upgrade since his promotion last month.
Do you want to read more about what a Marine Corps Birthday Ball is all about?  I wrote a post about it last year.

There is a slight change to the linking rules about your own tutorials - please read!
What did you finish this week?

NEW RULES FOR LINKING UP!  Please read carefully.  The delete monster will be eating non-compliant links.
1. Please write the post for sew & tell - or add a blurb mentioning sew & tell to a post written earlier in the week.  If you are linking to a post with your own tutorial, please make sure it was a finish from this week and that the completed project is shown first.
2. One linky per person. (please put multiple projects in one post.)
3. Link to your specific post.  (See here for permalink instructions - or email me.)
4. Link back here with a link or a button.
5. Comment away!


Wednesday, November 10, 2010

fake it til you make it + pretty fabric +wip

I've been feeling a bit of a slump in my blogging.  So I decided I would do some easy fun posts to get me back in the groove.  It *might* be working.

Should I start with some gratuitous fabric shots?

I bought my ball gown fabric from Fabric.com. I needed to spend a couple dollars more to get free shipping. I ended up with 3 yards of the Henna Garden that I love so much. I might need to get more of the green.  I think these would make adorable dresses.
one of my all-time favorites

I also finally caved and bought some of Bonnie and Camille's Bliss. I had been eyeing it for a while and wanting to get on the red and aqua bandwagon.  It was Mary's mug rugs that convinced me. This was an add-on to another order to optimize my shipping costs.
Bonnie and Camille's Bliss

Because these had finally come in!!
I heart my Kona color card

Thanks to Kathy at Pink Chalk Fabrics for emailing when she got them back in stock! I ordered it the same day. And due to my partially brain dead state, I accidentally had the order sent to my old address in Virginia. Luckily the post office came through and got it forwarded to the right place. TEN DAYS LATER. But at least it didn't get lost. Thank you Kathy for shipping it with delivery confirmation!

So I cut out and put together the main bodice of my dress. AND, the scary part, I tried it on. I think taking a smaller seam allowance is going to be the only size alteration I need to make - which is quite a relief! This nursing body of mine is not quite what I'm used to.
WIP - top to my ball gown
It doesn't look spectacular on the hanger, but today I'm going to add the ruffle and maybe even the sleeves! and then we'll see. I might also make it just a tad bit longer. I like to make my short-waisted self appear longer.

And just to keep it real, I cleaned off my sewing table and it still looks like this.
keeping it real.

That black fabric in the bag is the fabric for my dress. I hope I won't look like I'm going to a funeral.  Especially since it's a BIRTHDAY ball!  Happy 235th United States Marine Corps!  Semper Fi!

Friday, November 06, 2009

sew & tell v.1.0.9 - deadlines!

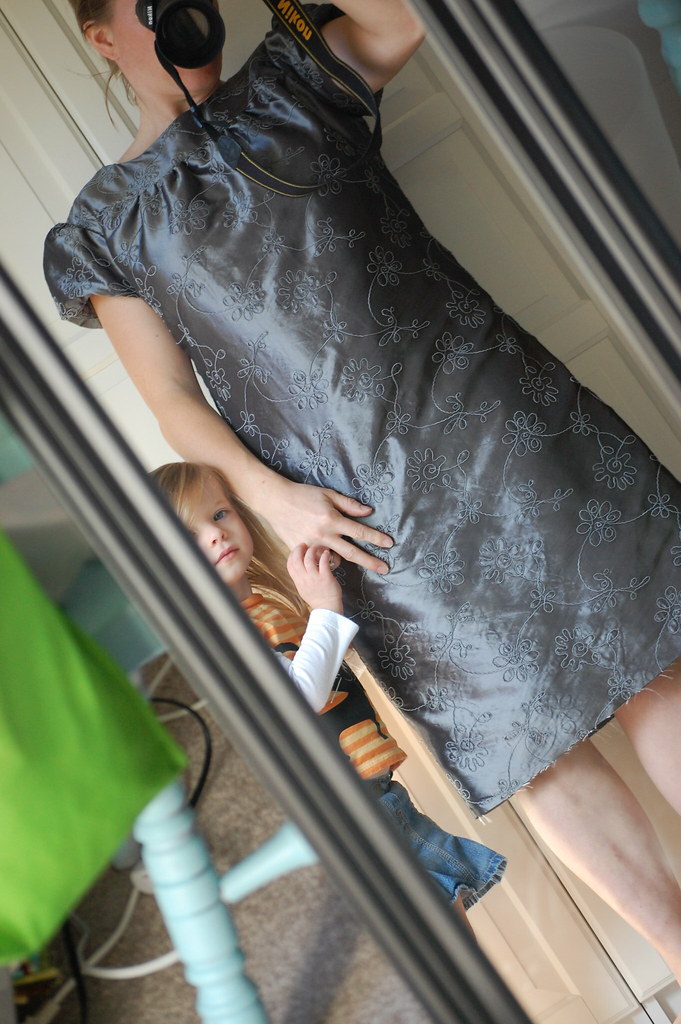
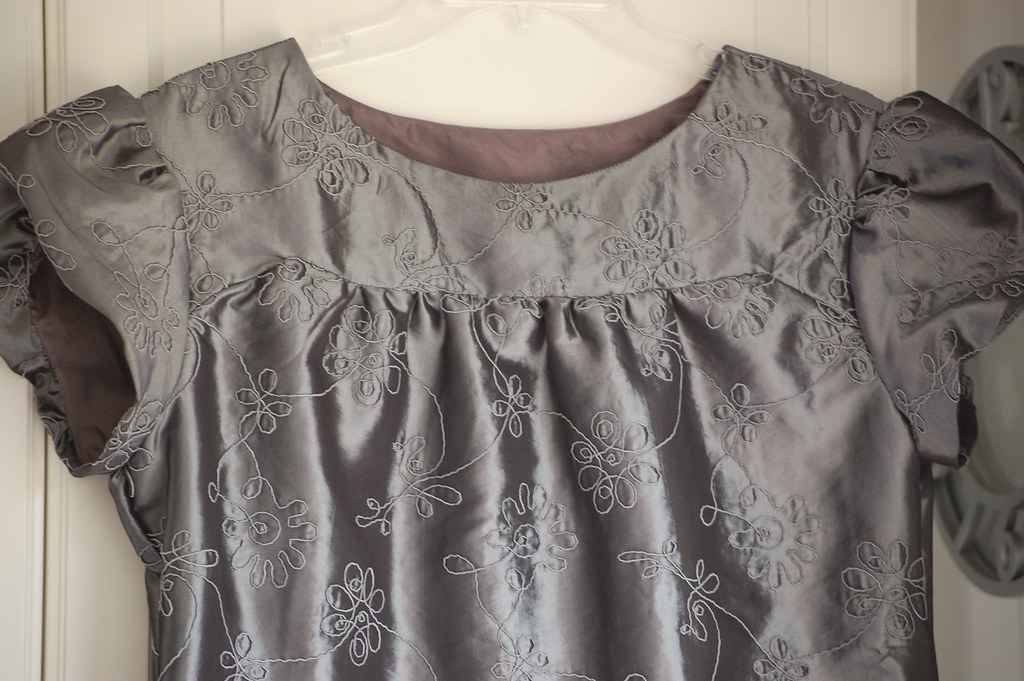
It's finished!! (well - enough - I still have to hem it! Plus I won't be able to post a good picture of it on until someone else is here to take it....)

I have to say, I'm happier with it than I thought I would be.  I was really nervous it was just going to make me look, well, fat.  But it's cute and comfy and that's what counts when you are pregnant and want to eat every last morsel of food on your plate.  :)

The sleeves weren't as bad as I thought they would be.  It's been at least 15 years since I made myself a dress (and I used to do it more than I realized) so a lot of the steps came back.  This was a little different - but it made for a very nice result.

  
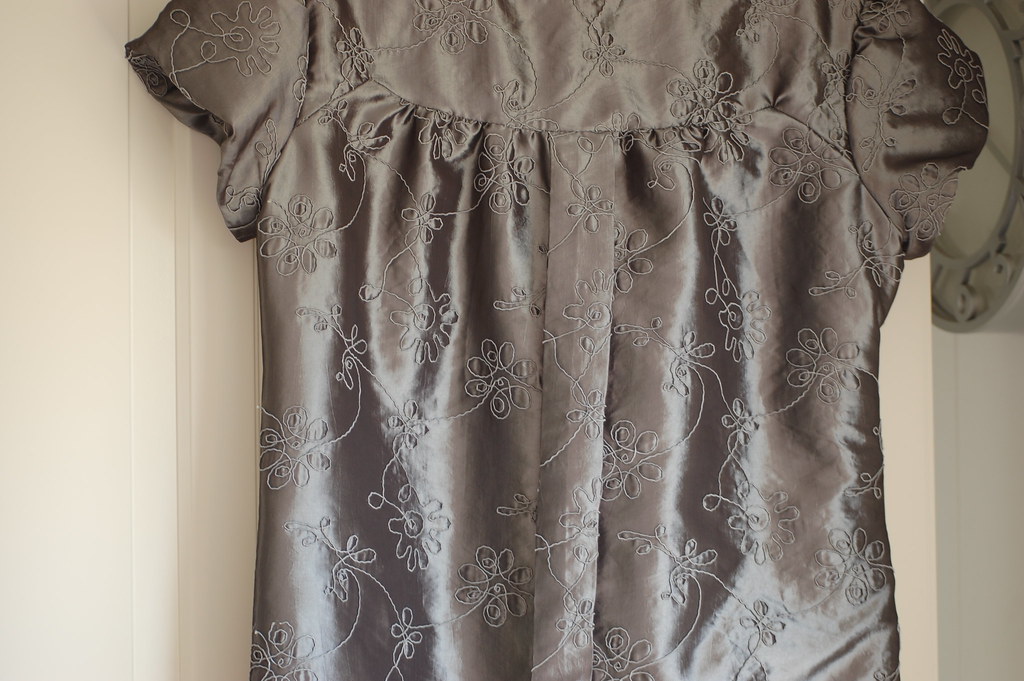
It has this pleat all the way down the back.  I considered omitting it, but I kind of like the detail.  I just hope it doesn't pooch too much around my backside, if you know what I mean!


No, I didn't make the shoes, I just had to show them to you.  I bought them in Belgium about 15 years ago.  I walked by them every day on my way home, and unfortunately wasn't great at converting Belge francs to dollars.  I thought they were cheaper than they actually were.  But I figure if I am still getting use out of them this much later, it was totally worth it!  Plus, I love how the flowers echo the embroidery on the fabric.


 Here's a sneak peek- don't worry, I'm going to buy some black pantyhose today to cover up those scary winter legs!  My daughter can't resist a photo op.  Or a princess dress for that matter.  She was asking if we were going to dance at the ball - I didn't break it to her that we won't see Cinderella there.

One other note:  It's really important to link to your POST, not just your blog.  If people come by to check links later and it just goes to your blog, there's no guarantee they will find your sew & tell post if you have posted since then.  If you have any questions, I'm happy to help!!

Remember to get the link to a specific post follow these steps:
Once you have published your post, view your blog.
Click on the title of your post.
Look up in your browser address bar and find the address for that page.  For me it looks like this:  http://www.amylouwho.com/2009/10/sew-v108-another-one-of-those-weeks.html
So basically it's your blog address and then some.

Can't wait to see what you've gotten done! We had a record attendance last week - 30 people!!

If you are new here to sew & tell, here are the few short rules:
1. Link to a post about a finish you had this week (don't just link to your blog, please!)

2. Link back to this post so more peeps can join in the fun! If it is a post from earlier in the week, just please add a note about sew & tell . Now that we have a button this is super easy - you can just cut and paste the html from over there on the right sidebar! 

3. Enjoy getting motivated and patting each other on the backs in the comments! This is the funnest part about sew & tell - sharing and inspiring! 

Oh, and if you post after Friday - make sure to leave me a comment so I know to come see you!

Related Posts Plugin for WordPress, Blogger...